Wednesday, November 30, 2011

Advent calendar

I spent the better part of today setting up our Advent Calendar! 

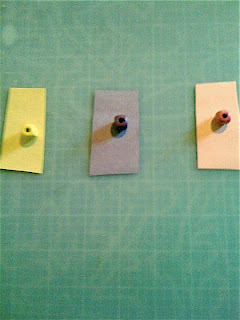
This was really, really easy.  I cut Christmas Trees out of card stock, then cut tiny tags to put the numbers on.

I wrote the activity for the day on the back of the tree, then used a small piece of pipe-cleaner to hook the number tag to the tree.  (The reason for not putting the numbers right on the tree is simple.... by putting the numbers on a separate tag, I can exchange the activities for day number 4 and day number 9, for example.. by being able to move the numbers, I can change the schedule to fit our plans for the month as they develop!)

I ran a piece of silver ribbon through the pipe cleaner on each tree, to hang them.  Super cute and easy. 


For anyone interested, here are the activities we used (but, like I said, don't get attached to the order.  I am nearly certainly going to rearrange some of these throughout the month!)

1 Make salt dough ornaments
2 Coloring page
3 A Christmas Carol movie 
4 Candle craft
5 Make chocolate chip cookies
6 St. Nicholas Day celebration! 
7 Rudolph the Red-Nosed Reindeer movie 
8 make a Christmas tree snack
9 Paint salt dough ornaments 
10 in search of santa
11  coloring page
12 Make spiced apple cider
13 the story of Christmas
14 Go for a walk and see the Christmas lights!
15 the Happy Elf movie 
16  Make sugar cookies
17  Decorate sugar cookies 
18 The 12 Dogs of Christmas movie 
19 coloring page
20 Christmas tree button crafts
21 Graham Cracker Gingerbread houses
22 make chocolate spoons 
23 make Christmas creamer for Christmas morning coffee tray
24 Christmas cake for baby Jesus

Tuesday, November 29, 2011

Feelin' Crafty: Applesauce cinnamon ornaments!

My house smells like Christmas now!  The cinnamon scent is wonderful this time of year, and the kids had a ton of fun making these small ornaments.  :-)

These are so easy to make and, while I wouldn't eat them (probably wouldn't taste good), they are made with totally harmless ingredients!  I love that!

We used a 1 to 1 ratio of plain, unsweetened ("natural style") applesauce and cinnamon (I used 1 1/2 cups of each, but any amount will be fine as long as it's a 1 to 1 ratio).

It makes a "dough" pretty easily, I just blended with a spoon (just to note, wash the bowl and spoon fairly quickly afterwards!).  

I let the kids flatten their section of dough with their hands, then they tried the rolling pin to make it flat.  They used our plain metal Christmas cookie cutters to cut out the ornaments.
                                    

They'll take a while to dry.  From how mine are going, I'm guessing 4+ days - but it's super humid here, so maybe yours will be faster. Make sure to poke a hole for thread/ribbon if you're going to use them as ornaments.  After I took this picture, I ended up taking sticks from the yard, breaking them into small pieces, and using them to keep the holes open while they are drying - much, much easier than re-poking the holes every hour for the next 4 days.  


For the Kids Friday

Monday, November 28, 2011

Christmas word matching

This is a super-cute and really easy Christmas word matching activity that we have out this week!  Princess is mostly using it, but Bub is liking it too.


The objects are just random Christmas decorations that we had around the house - they'd also be easy to find at the dollar store or WalMart.  I picked objects that were mostly 3-4 letter words that were somewhat easy to sound out.
                                          

We used "star", "drum", "tree", "sled", "dog", "card", and "bulb".  I wrote out the name for each object on a small piece of cardstock.
                                         

The kids pick an object, then match the word to the object.  My kids love when we introduce seasonal themes into our homeschooling, so Christmas-themed games are always a hit.


Montessori Monday

Sunday, November 27, 2011

Christmas printable set

I love Christmas, so this printable set is particularly exciting to me!

To skip the breakdown and go right to the download, just scroll to the bottom! :-)

Copying patters (pages 2-4)


Ordering trees by size (page 5)


Completing patterns (pages 6-7)


Push pin star work (page 8)


Cutting strips (page 9)


ordering letters (page 10)


addition activity (pages 11-12)


line tracing (pages 13-14)


numerals and counters (pages 15-17)


sorting by color (pages  18-21)


Christmas Printable Set1

Saturday, November 26, 2011

Feelin' Crafty: Christmas ornament re-do!

Today, the kids took ornaments we had from a few years ago, and made them into kid-masterpieces for our tree. 

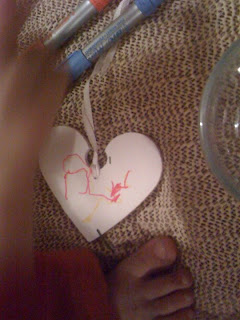
These are the ornaments we started with.  I picked them up at Ikea a few years ago, and I love them!  They were perfect with our sleek, modern, white-and-gold tree.  But, now the kids are old enough to want to help with the tree... so, this year, the tree is multicolored, bright, and traditional.  I was not willing to sacrifice these ornaments, though, so I had the kids re-make them into wonderful, colorful, and bright works of art.  

Here's what we started with: heart ornaments, markers, glue stick, and a cup of sequins. 

Color first!


 Then use the glue to add the sequins.

Here they are on the tree, aren't they cute?


Good deal on Tiny Print's Holiday Cards

Yesterday I shared our Christmas photo secret, plus my top picks for holiday cards this year!  Today, I just wanted to show you a deal that Tiny Prints posted on their blog this week, that makes for a pretty good deal on your holiday cards!  Buy a $25 gift certificate and $100 worth of Holiday cards, and you'll save $30 with the code 30OFFHOLGCERT at checkout!  Since this code was only posted on their blog, not on their main website, many people probably won't know about it.  It's only good through 11/27, though, so you should act on it now!  See the Tiny Prints blog for all terms and conditions here.

Friday, November 25, 2011

Christmas Cards!

With Thanksgiving over and Black Friday quickly drawing to a close, I'm starting to work through Christmas.  

While other people start with lists of gifts to buy, or holiday decoration plans, the first decision I always make is our Christmas cards.  Because we have family who live far away and we don't see often, our holiday cards are an important way to share our year with family. 

My first choice for photo cards in recent years has been Tiny Prints.  From birth announcements through invitations, Tiny Prints truly seems to have a card for most occasions! Their quality and customer service have been wonderful for us.  In fact, we're so pleased with Tiny Prints that they have agreed to give our family 50 holiday cards just for sharing our Christmas card plans with you all! 

I've spent a few hours reviewing the holiday cards available on Tiny Prints this year, and I've narrowed my options to two!  Since I'm having a hard time deciding, I thought I'd share both with you.  

The first option is the Fun Fair Isle: Bright Green.  This is a cute card, I love the colors, and the inside spins, so you can double the amount of pictures!  

The second option we're looking at this year is the Berry Wonderful: Cranberry tri-fold card.  This is also bright, fun color and holds 10 pictures!  


Our Christmas card sending secret... we don't take christmas pictures to use in our cards!  Every year, I intend to.. and we never get around to it before it's time to order cards.  So, instead, I take my favorite pictures of the kids, both together and separate, through the year, convert them all to black and white in photoshop, and use those on our cards!  With a bright card, black and white pictures look super-cute, and they save the problem of "this picture doesn't match that picture".  

Check out all of Tiny Print's cards here.  What's your favorite? 

Wednesday, November 23, 2011

Homemade cranberry sauce


The Princess was our cranberry sauce maker this year.  Homemade cranberry sauce is a Thanksgiving tradition around here, and The Princess did a great job making it (with two adults standing with her to help/supervise)!

Start with a big pot, 2 cups of water, white granulated sugar, and 24 oz fresh cranberries.

Add the two cups of water to the big pot.

Then add about 1 1/2 c of sugar to the water.  (Note that this will make a less sweet, more tart sauce.  If you like your cranberry sauce more sweet, up the sugar to 1 3/4 to 2 1/4 cups.)

Mix the sugar into the water. 

Heat till boiling (carefully!).


 Add the cranberries to the boiling sugar water (carefully!).

Keep the burner on high, and let the water come back to boiling.  The skins of the cranberry sauce will start to split (sometimes it makes a fun popping noise).  Stir occasionally.

It's done when all the cranberries are soft, with split skin.

An adult should pour the sauce into whatever container you want to cool it in.


Fresh cranberry sauce.  Done.

Tuesday, November 22, 2011

Feelin' Crafty: Kid-made chocolate stirring spoons

We made these as a fun treat for Thanksgiving morning coffee (gotta start that lonngg day of cooking with coffee, right??), but they'd also be super-cute as a Christmas treat or even a Christmas gift!  

These are super-simple to make, and my kids had SO much fun.

You'll need a few things before you start.
- chocolate chips (this is kind of up to your taste.  we like dark chocolate in our coffee, so I used semi-sweet.  If you're more of a "pour on the sweet" type of coffee drinker, then probably milk chocolate would work better for you.)
- plastic spoons (just a note, you will be putting these into hot melted chocolate.  I always recommend a good brand of plastic spoons so they don't melt)
- clear plastic wrap (to wrap up the spoons)
- ribbon (I forgot to buy Thanksgiving ribbon, so I used leftover Christmas ribbon from last year.  Thus, the weird green-and-gold combination)

- decoration, as wanted (I forgot to buy this, too, so we used leftover sprinkles.  I will say that my coffee-purist husband won't use the chocolate spoons with any decor on them - the semisweet chocolate is as far as he's willing to go)

First step is to melt the chocolate.  True confessions, we don't own a microwave.  We used to... but we never really used it.  Plus, I hate to clean it.  AND, our tiny crackerjack box house has a tiny kitchen, with no room for a microwave.  So, I melt chocolate in a glass bowl over a metal pot of boiling water - think a DIY double boiler.  A microwave would also work.

Let the chocolate cool just a TINY bit, then stir it and pour it into a bowl.

Dip the first spoon into the chocolate... and kinda try to get as much on the "right" side of the spoon as you can.  The back of the spoon should be wiped as clean as possible, because that's the side that will lay on the plastic wrap.


Then drop your decorations onto the still-hot chocolate.


Then place the chocolate onto a small square of plastic wrap and let it sit.  When the chocolate has cooled and hardened, pull the plastic wrap around the spoon and tie it together with a pretty ribbon.


Store in the fridge up to a week before use. 

Monday, November 21, 2011

Keeping Bigger Bit Busy: Tot School Thanksgiving Take-Along Bag

Here's Bigger Bit's Thanksgiving Take-Along bag!


 Bead Stringing.  The cord is just taped to a piece of cardstock to hold it in place.

Color matching with beads and pieces of construction paper.

 One-to-one correspondence.  9 squares of white paper and 9 rocks, one rock for each square.

 Rock color matching game.


Tot School