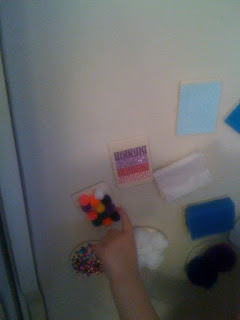
Bub and Bigger Bit LOVED these. They actually were entertained for the whole time I cooked dinner, then again while I washed the dishes and cleaned the kitchen after dinner!
The texture magnets weren't at all hard to make, were very affordable (I used mostly materials I had on hand), and provided hours of entertainment. They also are a wonderful sensory experience for children... Bub was particularly impressed with sorting the various textures (smooth, soft, rough, etc.). Bigger Bit preferred to separate the rectangle shaped magnets from the circle shaped ones. The Princess, when she came home, sorted them into two categories: princess-y (pretty much anything shiny) and not princess-y.
I found these small pieces of wood at the craft store. They came six to a package and were less than $6 for the two packages I bought.
I used things we had around the house to create various tactical experiences on each piece of wood.
I used:
- small pompoms
- big pompoms (these feel very different than the smaller pompoms. The small ones are much firmer, whereas these are more puffy)
- cotton balls
- sponge
- laminated piece of white paper
- sequins
- felt
- sponge
- glittery cardstock (the glitter on this cardstock gives it a very rough, uneven texture)
- wax paper
- moss sheet
- "jewels" (this is actually one of those sheets of connected tiny jewels that's used to decorate phone cases and stuff. much easier to use than individual jewels.)
The materials were glued onto one side of the boards, and I super-glued magnets to the back.
In the process of gathering my texture materials, I ended up with more material than I had pieces of wood, so we'll be adding to this collection throughout the rest of the year.
Linking to:


These are wonderful. I had never thought of making them into magnets.
ReplyDeleteWhat a great idea! Shared this on fb and twitter!
ReplyDeleteMy 1 year old would LOVE these! I have a Joann fabric coupon I need to use and I think I know what project we'll be going for! :)
ReplyDeleteThank you!
Heidi
www.workandplaydaybyday.com
This is such a creative idea! And I love that you could move on to extensions with a blindfold and/or with matching if you have two of each. Thanks so much for linking up with Montessori Monday. I featured your post at the Living Montessori Now Facebook page: http://www.facebook.com/LivingMontessoriNow
ReplyDeletehow creative & fun. So nice to have them as magnets so they can display on the fridge and entertain the kids while you cook! :)
ReplyDeleteThanks for linking to the Sunday Showcase & sharing your creative fun! I hope to see you back this week - http://momto2poshlildivas.blogspot.com/search/label/Sunday%20Showcase
Bern